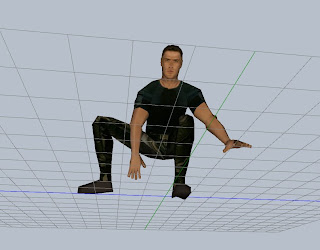
Creating a character from start to finish requires a game plan. I used to work with a content artist that would spend about 8 hours working on a single plant. So, when you're talking about a fully rigged and textured character with multiple animation sequences you start measuring the task in days. And, if it's a main character it may be a few weeks.
This model above is of John Crighton from the Sci-fi Show FarScape. By the way, if you haven't already, I highly recommend it. Give it a few episodes to get over the puppet factor and it's a really good storyline (Thanks Matt!). Anyway, this character is fully rigged and textured (1900 polys). It took around 8 hours to complete.
I used a simple mirror tool (In my editor, Artismo) to keep the character symmetrical. And, used extrude and line-flip and line-split functions to shape the character. After finishing the basic shape you want to save a copy for future models to add to your 3D tool box. Note: If you want a copy of my basic model let me know.
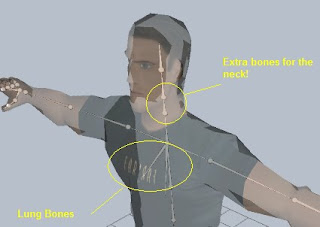
Once you are finished with the shape of the character, you should begin building a basic skeleton. While you're making the skeleton, add some extra bones for the lungs and for the neck as shown here:

You now have a base skeleton and character for any of your characters. You just need to customize them. Note that I didn't attach the model to the skeleton at this time. Since this is a generic character you may end up changing the shape before you're ready to rig it to the bones.
After doing the rigging, then it is time to paint the character. One mistake I've been guilty of is painting too many of the shadows especially around the neck and face. These fake shadows turned out looking really bad. It is better to use the model geometry and a light shading to augment the character shape. It's not like 2D drawing. This model started looking a lot better after I removed those shadows.
One tip to keep in mind when texturing is to lay out your geometry on the texture so you can line things up. You don't want to have the backs of the legs pointing upside down if you have to wrap some detailed clothing around it. By the way, next time you're walking around take a look at the patterns on people's clothes and how they wrap. You may notice that none of the patterns line up correctly on the seams. But, they're good at hiding the seams where you won't notice! Keep that in mind when you do your textures.
That's about it for now. I've got work to do on my 3D tank game and my next character is Dargo from Farscape. If you want a copy of Artismo let me know.
Jason


